Learn the Basics
By default, the loaded modules are only the original ones. To access more modules from other manufacturers, you need to include an additional library.
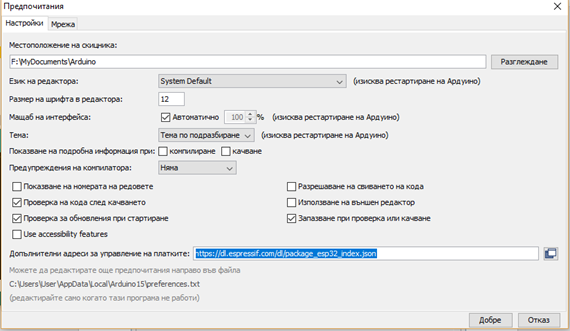
Enter the following address https://dl.espressif.com/dl/package_esp32_index.json in File / Preferences / "Additional board management addresses" and confirm.
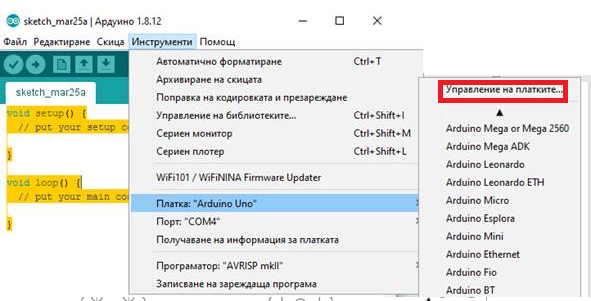
From Tools / Boards - select “Manage Boards”.
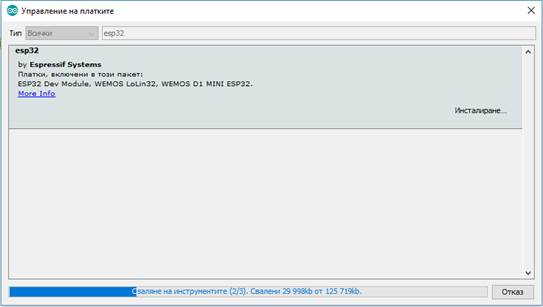
Enter ESP32 in the search box. Install the Espressif Systems library .
Additionally, you can install the “Board Identify” library from Tools / Library Management, which can help to automatically detect the exact version of your module.

Setting the parameters on board.
After installing the Espressif Systems library , additional modules in the ESP 32 group will appear in the PCB menu .
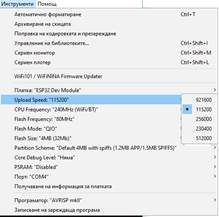
In this case we choose from the menu ESP Dev Module. Note that after making the selection and logging in to Tools a second time, the menu is significantly expanded. Now we can set some parameters of the specific module. Usually the programming speed is selected 115200. Depending on the application you are developing, you may need to change other parameters, such as Flash Size , Partition Scheme or others.
When we get here, we can do the first test to see if we made the choice of plaque correctly, and if the installation is correct.
First program
Let's write our first test program in the editor:
void setup () {
Serial.begin (115200);
}
void loop () {
Serial.println ("Hello. This is a test for proper operation of ESP-WROOM-32");
delay (1000);
}
The program defines the exchange rate with the device 115200 b / s . In the cycle below, the message "Hello. This is a test for proper operation of the ESP-WROOM-32" will be sent to the serial monitor every second.
Note: The serial monitor is an element of the Arduino IDE. It is used to display current information during program execution. The output to the serial monitor is organized by the programmer and there he displays the control information. The serial monitor is turned on from the Tools / Serial Monitor menu.
Now we need to load the program in the ESP
32 module. Check for errors (only compilation, we can
do with the button , and compilation and loading,
through
, and compilation and loading,
through . You can also do it from
the menu "Sketch".
. You can also do it from
the menu "Sketch".
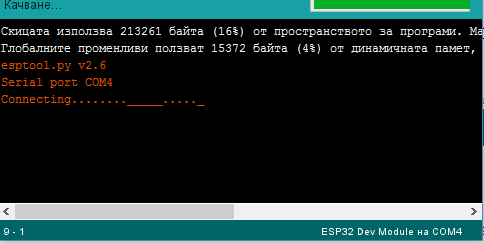
When selected , at the bottom of the work
screen for information about how the process is going. When the
message Connecting …… _____........ appears, you are expected to
press the Boot button of the module once or several times
for about a second until the connection to the module is made.
, at the bottom of the work
screen for information about how the process is going. When the
message Connecting …… _____........ appears, you are expected to
press the Boot button of the module once or several times
for about a second until the connection to the module is made.
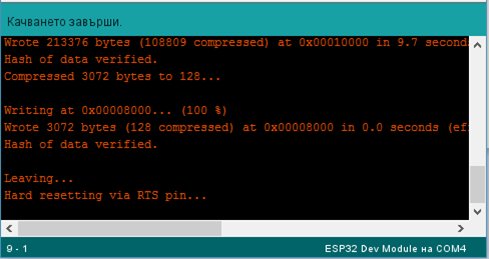
Errors are displayed during the upload.
The process usually ends with a message: Upload complete.
Result of the implementation
Now we can run the serial monitor and we need to see the message we send print every second.
Objectives: In this study, design, setup, code writing, data collection, data transfer to the remote system and graphical representation are the project implementation methods