Installing and acquaintance with the environment
Arduino Microcontroller. Installing and acquaintance with the environment
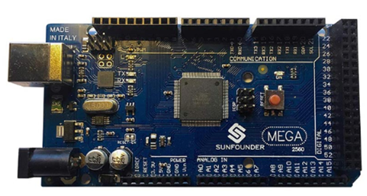
A computer can be programmed to detect an event that was triggered by a sensor, and then perform an action based on that event. Microcontrollers are a great platform for performing these tasks due to their miniature size and meager power requirements. A microcontroller unit (MCU) is a simple computer designed and built in a small form factor. When paired with sensors or actuators, microcontrollers can be programmed to act based on triggers. The Arduino, shown in фigure is a popular microcontroller for prototyping.
Arduino boards are able to read inputs, such as light on a sensor, a finger on a button, or a Twitter message. They can then turn the input into an output, such as activating a motor, turning on an LED, or publishing something online. All of this is defined by a set of instructions programmed through the Arduino integrated development environment (IDE).
The SparkFun RedBoard is an Arduino-like board with an ATmega328 microcontroller that can be programmed over a USB Mini-B cable using the Arduino IDE. It is capable of taking inputs (such as the reading of a light sensor or the push of a button) and then performing various actions (like blinking an LED or moving an actuator) based on how you program it.
Building a Circuit
Remember that a circuit needs a continuous loop and a power source in order for electricity to flow. A simple circuit can be created by connecting electronic components (LED, resistor, and jumper wires) in series along a row on the breadboard, shown in the figure. When the row has been connected, then the power source would be connected to the lower red and black jumper wires. This should complete the circuit and light the LED.
The Arduino IDE
The Arduino IDE software package is a program that allows you to interact with the Arduino board. It is free software that can be downloaded at the Arduino web site:
https://www.arduino.cc/en/Main/Software
The Arduino IDE software package contains the integrated development environment (IDE) as well as the required drivers for the Arduino boards. After the software has been downloaded, unzip the file and install the Arduino IDE software and drivers.
The Arduino IDE can be divided into four main areas.
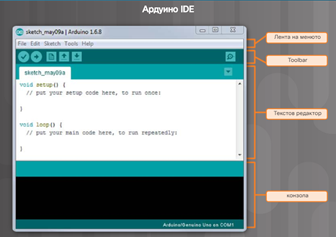
The MenuBar contains five menus: File, Edit, Sketch, Tools, and Help. These menu items provide access to additional context-sensitive commands that are only available if they are relevant to the work currently being carried out.
The Toolbar contains icons that provide tools to Verify the code in a program, Upload a program to the Arduino board, create a New program, Open an existing program, Save a program, and open a Serial Monitor.
The Text Editor is similar to other editors that you may have used. It provides the usual text editing features, including cut & paste and search & replace.
The Console displays text output, including program feedback, error messages, and other useful information.
Programs written using the Arduino IDE are called sketches and are saved with the file extension of .ino. Sketches can be stored into a sketchbook that can be opened from the File > Sketchbook menu or from the Open button on the toolbar. You can view and modify your default sketchbook folder location by clicking File > Preferences.
Note: It is recommended that you also download the SparkFun coding examples from http://sparkfun.com/sikcode. When they are downloaded, unzip the file and copy the SIK_Guide _Code_32 folder into the Arduino’s example folder (Program Files (x86) > Arduino > examples).